How To Setup Miracast For Windows 11
In this article, we will be discussing how you can setup Miracast for Windows 11 and use it.
1 How To Setup Miracast For Windows 112 Checking If Miracast Is Support By Your PC Or Not3 Setting Up Miracast For Windows 113.1 Installing The Latest Miracast Drivers 3.2 How To Cast Your PC To A Wireless Display3.3 How To Cast Other Devices To Your PC?4 Conclusion
Checking If Miracast Is Support By Your PC Or Not
Before you can use Miracast on your device, you will have to check whether the Miracast is Support on your device or not. To check if Miracast is supported on the device or not, follow the steps given below-
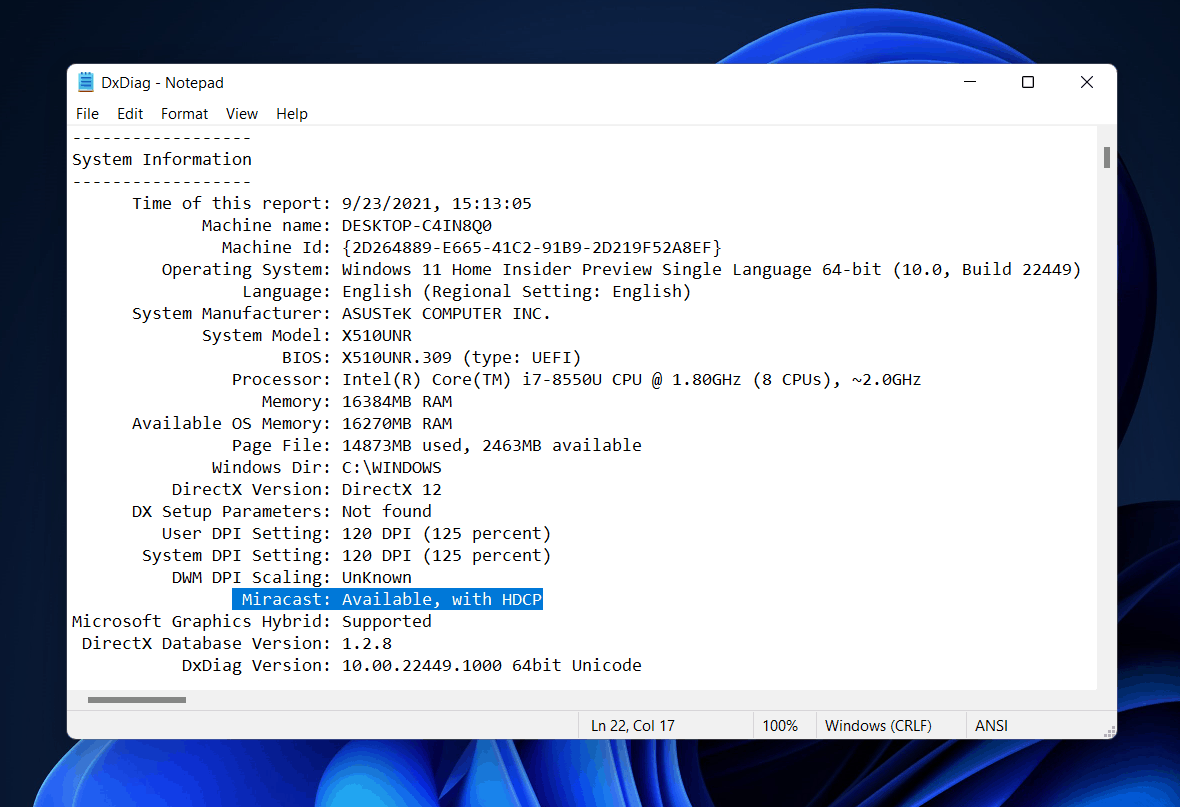
Open the Run dialog box on your PC by pressing the Windows + R key combo.In the Run dialog box, type dxdiag and hit Enter to open DirectX Diagnostic Tool. In the DirectX Diagnostic Tool, click on Save all information. You will now be asked to choose the location where the information has to be saved. Select Desktop and then click on Save to save the file.
Now open the text file that you saved with the Notepad. In the text file, look for Miracast and check if it is available or not.
Setting Up Miracast For Windows 11
We will be dividing the complete process into various steps. This part of the article will discuss how you can get the latest Miracast drivers, cast your PC to your Wireless Screen, and also how you can cast your other device to your PC.
Installing The Latest Miracast Drivers
You can download the latest drivers from the Windows update settings. To install the latest Miracast Drivers from the Windows Update, follow the steps given below-
In the Start Menu, search for Settings and open it.In the Settings, head to the Windows updates section from the left sidebar.Now click on Check for updates to begin checking for updates.Download and install all the updates that your PC finds. Also, ensure you check out the Optional update section and download and install all the optional updates there.After doing so, restart your PC to continue ahead.
How To Cast Your PC To A Wireless Display
Now that you have installed the latest drivers for the Miracast, you can continue casting your PC to a wireless display. To cast your PC to a wireless display, follow the steps given below-
Press the Windows + I key combo to open Settings on your PC.Here, head to Bluetooth & devices section in the left sidebar.Now on the right-screen, click on Add a device.On the window that opens up, click on Wireless display or dock. Now select the wireless display that is listed.
This will connect your PC to the wireless display.After doing so, you will have to set up the orientation for how you will project your PC to the wireless display.Press the Windows + P to open Projection Settings. Here you will see four projection settings- PC Screen Only, duplicate, extend, and Second Screen Only.
Set the orientation as you want to, and you will be able to project your PC to a wireless display.
How To Cast Other Devices To Your PC?
If Miracast is supported on your PC, then you can cast other devices like phones to it. To cast other devices to your PC, follow the steps given below-
Connect the device you want to cast and your PC to the same Wi-Fi network.Now press the Windows icon on your keyboard, and in the Start Menu, search for Connect and open it.
Now open the Miracast application on your mobile phone or any other device that you want to cast. You can either turn on the cast feature if your phone has that.Now, you will see your PC on the phone, select it and connect to it.You will now be able to cast your phone to your PC.
RELATED GUIDES:
How To Disable Or Uninstall OneDrive From Windows 11How to Turn Off Beep Sound in Windows 11Fix Windows Defender Not Working in Windows 11
Conclusion
This is how you can setup Miracast for Windows 11. We have mentioned the complete guide to cast your PC to a wireless display and cast other devices to your PC.
Δ


