Delete Printer Driver In Windows 11
In this article, we will be discussing how you can delete a printer driver in Windows 11.
1 Delete Printer Driver In Windows 111.1 Deleting Printer Driver Through The Settings App1.2 Deleting Printer Driver Using Print Management1.3 Deleting Printer Driver Using Command Prompt1.4 Deleting Printer Driver Using PowerShell2 Final Words
Deleting Printer Driver Through The Settings App
The very first way to delete printer drivers is through the Settings app. To delete the printer driver through the Settings app, follow the steps given below-
Press the Windows + I key to open the Settings app on your PC. Next, click on the Bluetooth & devices on the left sidebar of the Settings app.
Now on the right side, click on the Printers & Scanners. You will see a list of all the printers you have added to your PC.
Click on the printer for which you want to delete the driver. Now, click on the Remove button next to the printer to remove it along with the drivers associated with it.
If you are asked to confirm deleting the printer driver, click on Yes. Once done, restart your PC for the changes to take effect.
Deleting Printer Driver Using Print Management
Another way to do so is by using print management. Follow the steps given below to delete the printer driver using the print management-
Press the Windows key on your keyboard to open the Start Menu. In the Start Menu, search for Print Management and then click on it to open the app window. Expand the Custom Filters section on the left sidebar of the Print Management app window. You will now see a list of all the printer drivers on your PC.Select the drive that you want to remove from your PC. Right-click on it, and then click on the Remove Driver Packager option. You will be asked to confirm removing the driver. When asked to confirm your choice, click on Yes. This will delete the printer driver from your PC.
Deleting Printer Driver Using Command Prompt
You can also delete the printer driver using the Command Prompt. Given below are the steps to delete the printer driver using the Command Prompt-
You will have to launch the Command Prompt as administrator. To do so, open the Start Menu and search for CMD. Now, right-click on the Command Prompt and click on Run as administrator.
In the Command Prompt, type the command wmic printer get name and hit Enter to execute. You will now see the list of all the printers on your PC. Next, type the command printui.exe /dl /n “YOUR-PRINTER-NAME” and execute it. You will have to ensure you replace YOUR-PRINTER-NAME with the printer’s name that is displayed on the list.
The printer will now get removed. Ensure you restart your PC after doing so.
Deleting Printer Driver Using PowerShell
The last way to delete the printer driver is by using PowerShell. You can do so by following the steps given below-
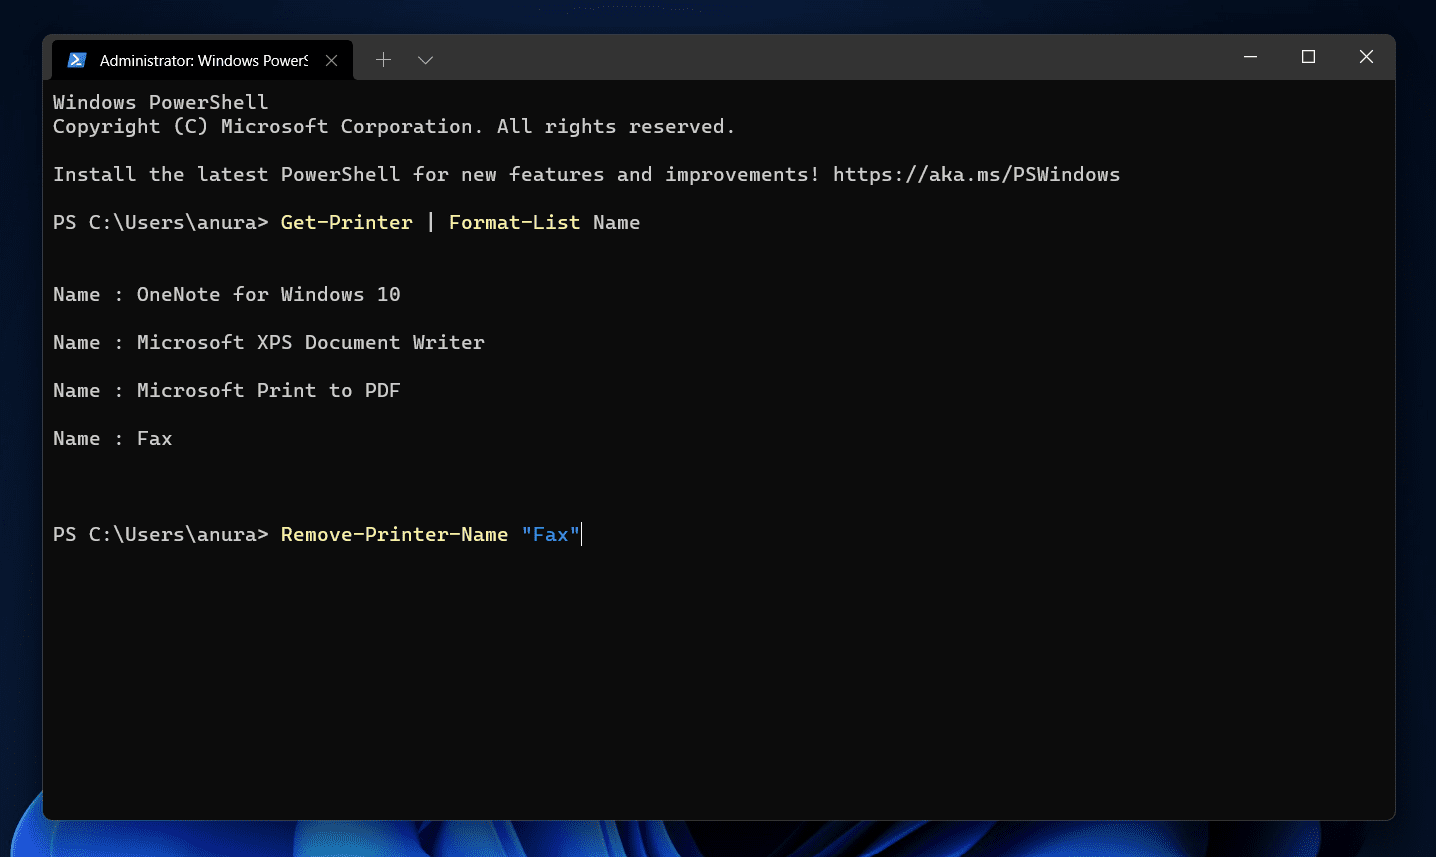
Press the Windows + X key combo, and then from the menu, select Windows Terminal (Admin). Now enter the command Get-Printer | Format-List Name in the Windows PowerShell and hit Enter to execute the command.Next, type the command Remove-Printer-Name “Your-Printer-Name” and hit Enter. Ensure you replace Your-Printer-Name with the name of the printer you see here.
This will remove the device along with its driver.
RELATED GUIDES:
How To Create PDF File in Windows 11How To Install Windows 11 Printer Drivers EasilyHow To Fix Windows 11 Printer Spooler Error
Final Words
This is how you can delete the printer driver on Windows 11. We have discussed the four ways to delete printer drivers in Windows 11 easily. Following the above steps, you will remove the printer driver in Windows 11.
Δ