Disable Unwanted Services in Windows 11
In Windows 11, there are several ways to disable non-essential services, and we’ll go over all of them in this article.
1 Disable Unwanted Services in Windows 111.1 Disabling Non-Essential Services Using Services App Window1.2 Disable Services Via Windows Terminal 1.3 Disable Services Using MSConfig2 What Non- Essential Services Should I Disable?
Disabling Non-Essential Services Using Services App Window
The very first way to disable non-essential services in Windows 11 is by using the Services app window. To do so, follow the steps given below-
Open the Start Menu by pressing the Windows key, and then in the Start Menu, search for Services. Click on Services in the search result to open the Services app window.
In the Services app window, search for the non-essential service that you want to disable.
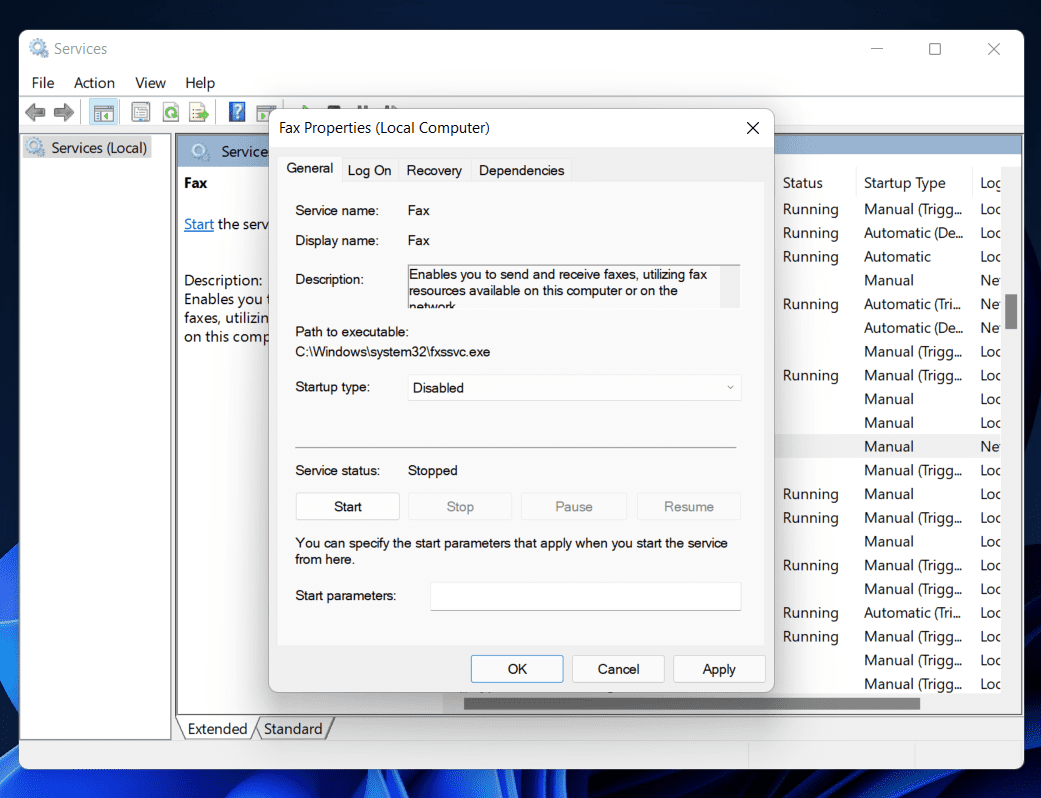
Double-click on the service. Click on the drop-down menu next to the Startup Type and select Disabled. Next, click on the Stop button to stop the service.
After doing so, click on Apply and click on OK.
Disable Services Via Windows Terminal
Another way to disable services in Windows 11 is by using the Windows Terminal. To disable services via Windows Terminal, follow the steps given below-
Press Windows + X key combo and then from the menu that opens up click on Windows Terminal (Admin).
In the Windows Terminal, type the command Set-Service -Name “SERVICE-NAME” -Status stopped -StartupType disabled and hit Enter to execute it. Here replace the service name with the name of the service that you want to disable.
After executing the program, that service will be disabled in Windows 11.
Disable Services Using MSConfig
The last way to disable non-essential services in Windows 11 is by using MSConfig. To do so, follow the steps given below-
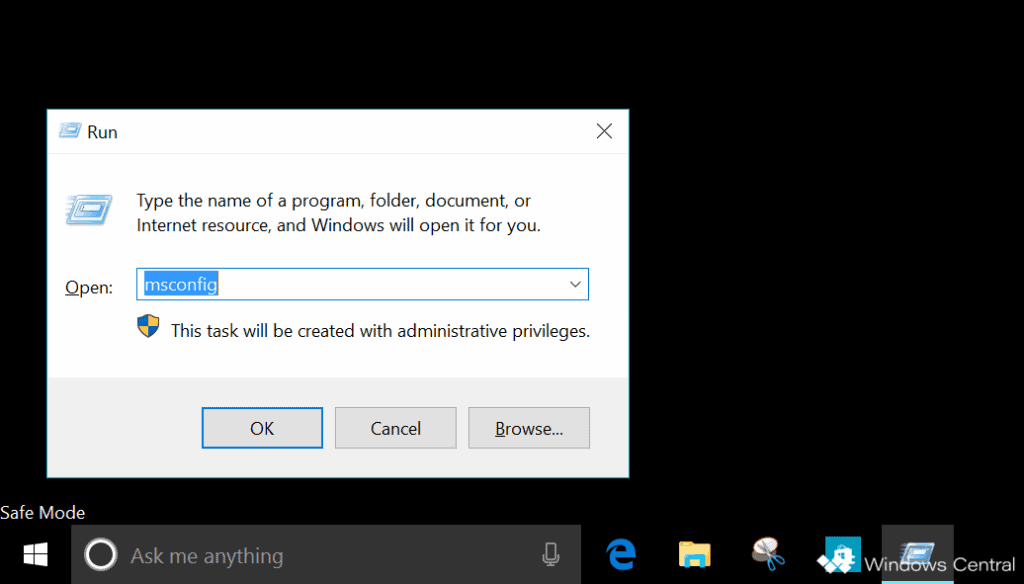
Press the Windows + R key and in the Run Dialog Box that opens up, type msconfig and hit Enter.
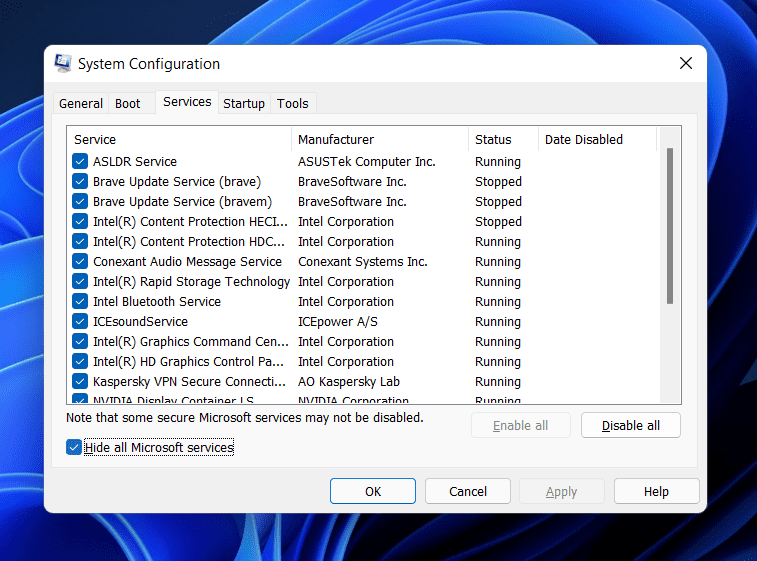
This will open the System Configuration app window. Here, head to the Services tab in the System Configuration.
Here, check the checkbox saying Hide all Microsoft Services.After doing so, click on Disable all.Once done, click on Apply and then click on OK. After doing so, you will be asked to restart your PC. Click on the Restart button on the dialog box that appears, and your PC will restart.
What Non- Essential Services Should I Disable?
There are various non-essential services that you can disable. If you don’t utilize a particular feature or app on Windows 11, then you can prefer disabling the service associated with them. Given below are some of the non-essential services that you can prefer disabling-
Fax- This service is associated with Fax, and if you don’t use it then you can disable it.Remote Desktop Services- This service is required to remotely connect to another PC, and if you don’t do that then disable it.Remote Desktop Configuration- Remote Desktop Configuration is another service that you can prefer disabling if you don’t remotely connect your PC to another.Windows Error Reporting Services- This service works around sending error reports, and you can safely disable it.Remote Registry– This service is only useful if you edit the registry through a remote computer. If not, then you can disable this service without any second thought.Retail Demo Service- If you are a Windows 10 Home user, then you won’t need this service as this is meant for Windows Retail Demo mode. You can prefer disabling this service.WalletService- This service is utilized by the Wallet app, and if you don’t use it then you won’t be needing this service.
These are some non-essential services that you won’t be needing. There are various other non-essential services that you can disable. RELATED:
How To Enable Or Disable Find My Device In Windows 11How To Track Internet Usage On Windows 11How To Fix Command Prompt Not Working On Windows 11How To Fix Windows 11 Taskbar Crashing After Update
This is how you can disable non-essential services in Windows 11. Following the above steps, you will be able to disable all the non-essential services on your Windows 11 PC.
Δ


