Fix Memory Leak In Windows 11
In this article, we will be discussing how you can fix memory leaks in Windows 11.
1 Fix Memory Leak In Windows 111.1 How To Check If There’s Memory Leak In Windows 112 Troubleshooting Steps To Fix Memory Leaks In Windows 112.1 Close File Explorer Windows 2.2 Make Changes In The File Explorer2.3 Close Unnecessary Apps And Browser Tabs2.4 Manually Clean The RAM2.5 Close Startup Apps And Services2.6 Update Windows 3 Final Words
How To Check If There’s Memory Leak In Windows 11
Firstly, you will have to check whether there’s a memory leak in Windows 11 or not. To do so, follow the steps given below-
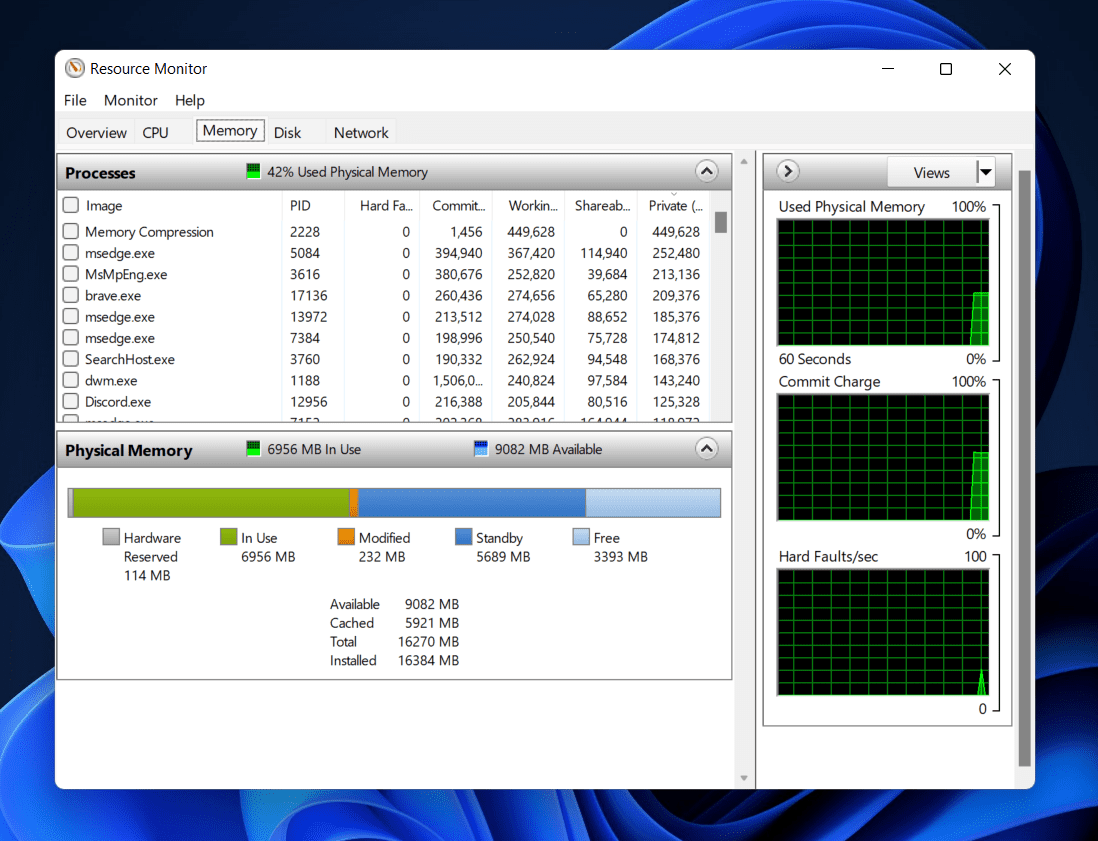
Open the Start Menu and then search for Resource Monitor. Click on Resource Monitor in the Start Menu to open the app.Head to the Memory tab in the Resource Monitor.
Here, check the physical memory. You will have to check the memory consumption, due to which there will be less memory in standby and less free memory.
Troubleshooting Steps To Fix Memory Leaks In Windows 11
Given below are all the fixes to fix memory leaks in Windows 11-
Close File Explorer Windows
Many users have reported facing the memory leak with the File Explorer app. You should try to close the File Explorer in Windows 11 to check if that fixes the issue or not. Right-click on the File Explorer icon on the taskbar and click on Close all windows to close the File Explorer app. This should most probably fix the issue that you have been facing. However, if the issue is not fixed, you should move to the next troubleshooting step mentioned in this article.
Make Changes In The File Explorer
Even after you have made the changes to the File Explorer, you are likely to experience issues with it. Therefore, you will have to make certain changes to the File Explorer to ensure you fix the memory leak issue. To do so, follow the steps given below-
Open the Start Menu by pressing the Windows key on your keyboard.
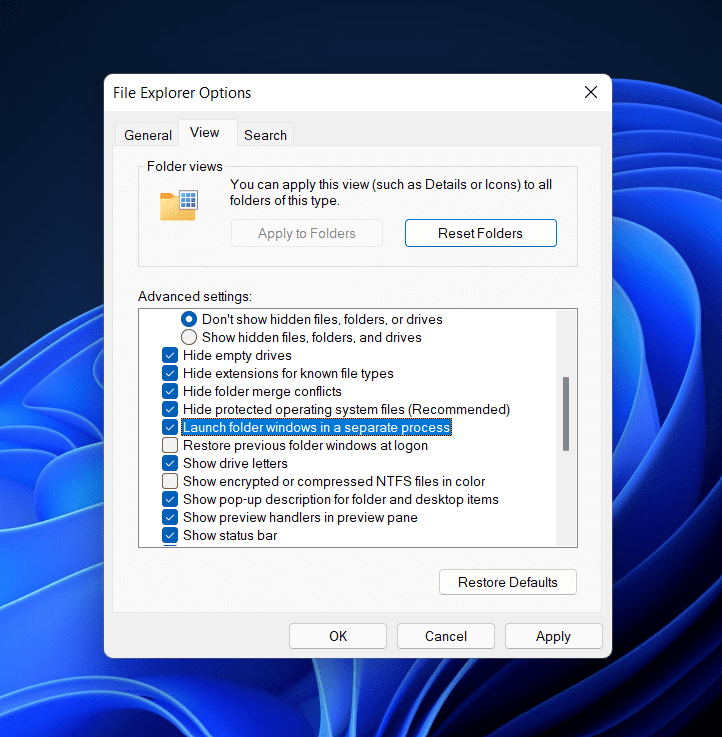
In the Start Menu, search for File Explorer Options and click on it to open it.Head to the View tab in the File Explorer Options.
Here, check the checkbox saying Launch folder windows in a separate process. Click on Apply and then click on OK to save the changes.
Close Unnecessary Apps And Browser Tabs
Another thing that you can try doing is closing all the unnecessary applications and browser tabs. If you have unnecessary apps opened on your PC, this may also be why facing memory leaks. You should try closing all the unnecessary apps and all the unnecessary browser tabs. The issue should be solved by now. However, if it isn’t, you should move to the next step in this article.
Manually Clean The RAM
You can also try manually cleaning or freeing up the RAM. You can do so by using the Task Manager. To manually clean the RAM, follow the steps given below-
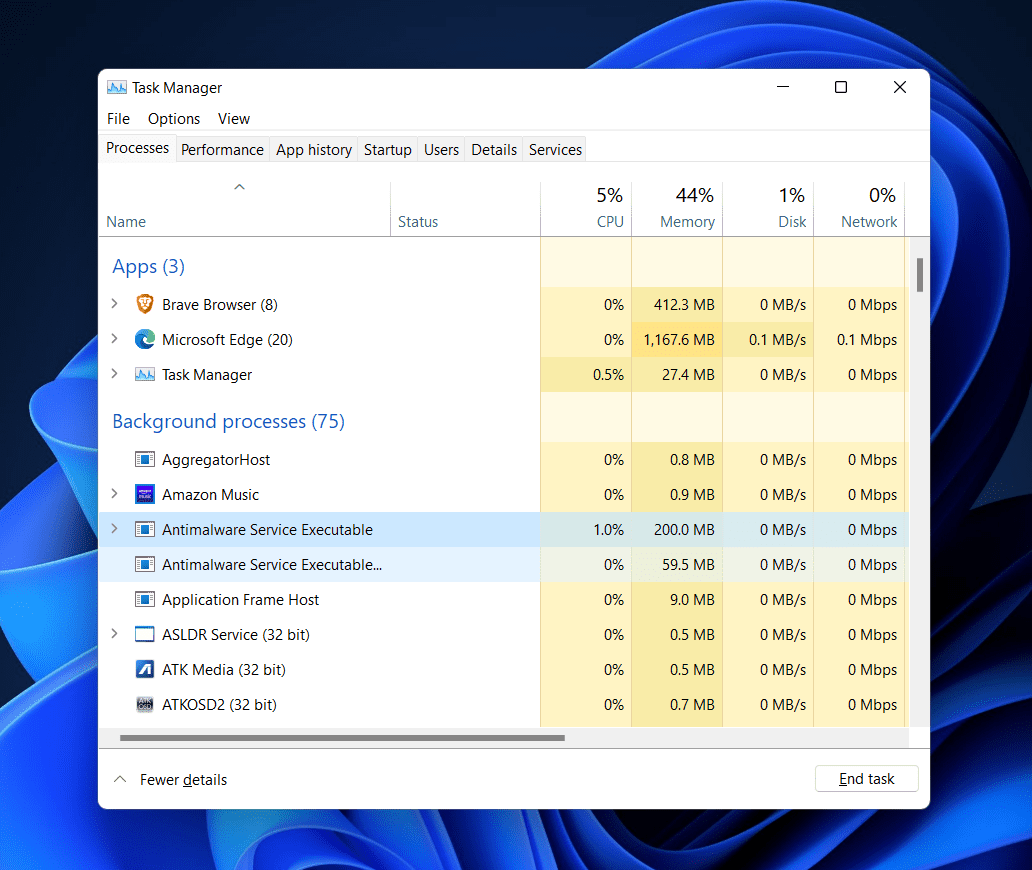
Press the Windows + X key combo or right-click on the Start icon on the taskbar.From the menu that opens up, select Task Manager and open it.Ensure you are on the Processes tab in the Task Manager. If you are not on it, you can click on the Processes tab.
The Memory section here will show which process is consuming a lot of RAM. Close unnecessary processes that are consuming a lot of RAM. To do so, select the process, and click on End Task.
Close Startup Apps And Services
Memory leak issues can also be fixed by closing the Startup apps and services. When too many apps and services open up during your PC’s startup, it can consume a lot of your RAM. This can probably cause the memory leak issue. You should try closing the startup apps and services to fix the issue. To do so, follow the steps given below-
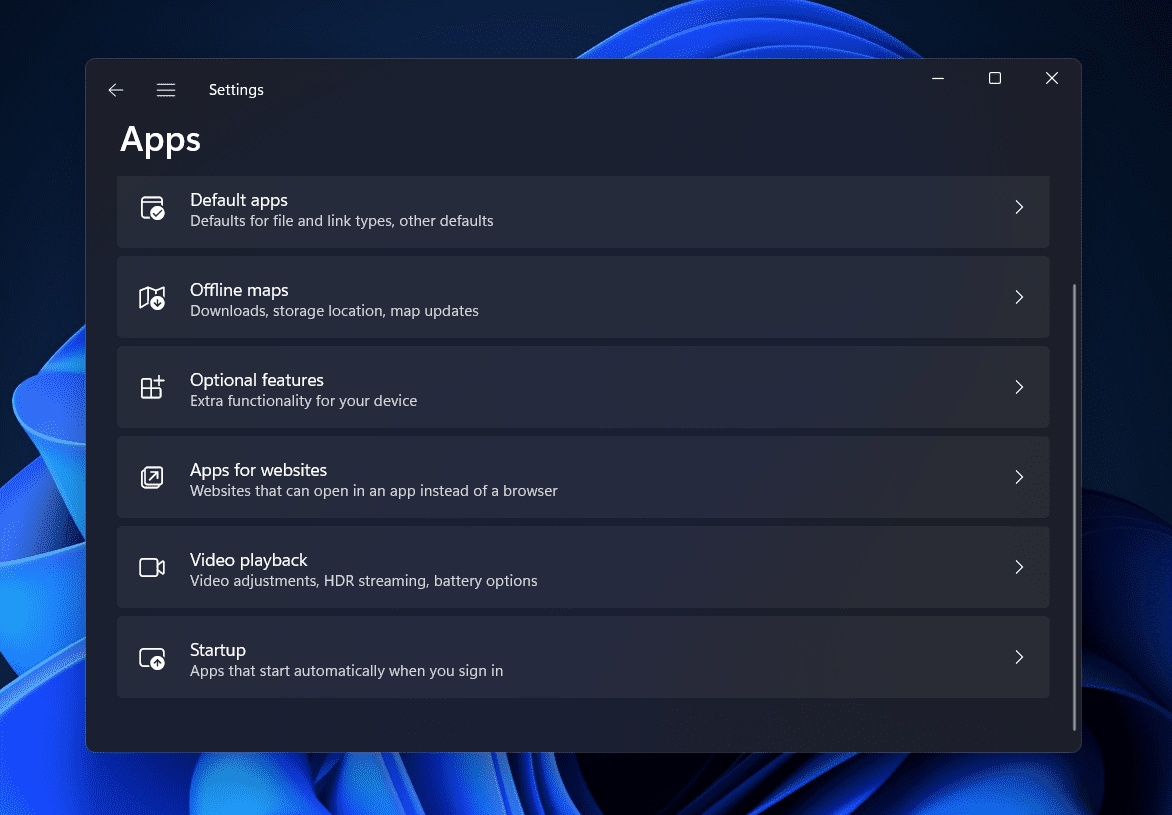
Open the Settings app on your PC by pressing the Windows + I key combo.Head to the Apps section from the left sidebar of the Settings app, and then on the right side, select Startup.
Now turn off the toggle for the apps which have a high impact.
This will close all the startup apps and services that can be causing the issue with your system.
Update Windows
Updating your Windows to the latest version can often fix the issue you have been facing. Microsoft releases bug fixes with every new update, and a new Windows update can fix the Memory leak issue. To update Windows, follow the steps given below-
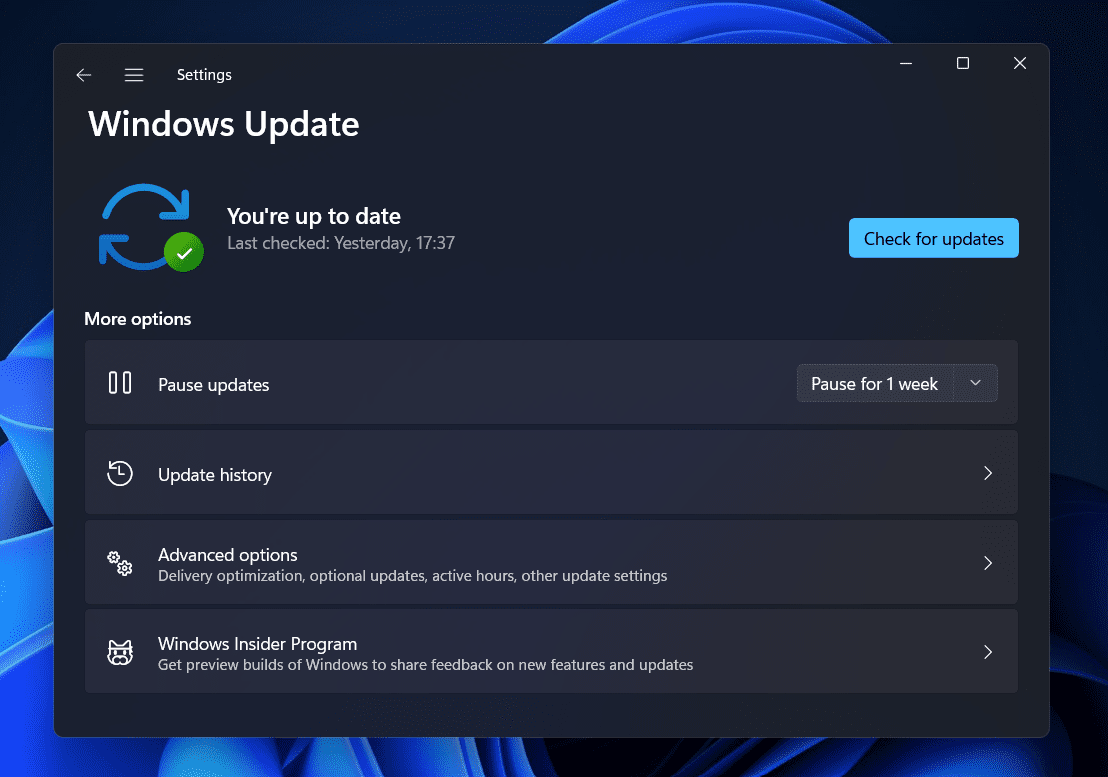
Press the Windows + I key combo to open the Settings app on your PC.Now on the left sidebar of the Settings app, click on the Windows Update section.
On the right side, click on Check for updates. Download and install all the updates you find, and then restart your PC. This should probably fix the memory leak issue in Windows 11.
RELATED GUIDES:
How To Delete Restore Point In Windows 11How To Fix Update Error 0x80070643 in Windows 11How To Change MAC Address on Windows 11How To Speed Up Windows 11 and Optimize Performance
Final Words
Memory leak issues can make your PC slow down and unresponsive. If you have been facing a memory leak issue in Windows 11, then you can follow the steps in this article. We have discussed all the troubleshooting steps to help you fix the memory leak in Windows 11.
Δ