Import and Export Virtual Machine in VMware
#1. Import Virtual Machine
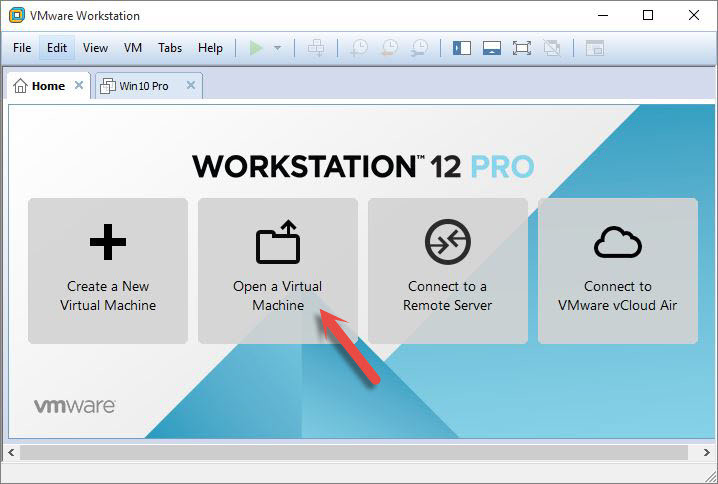
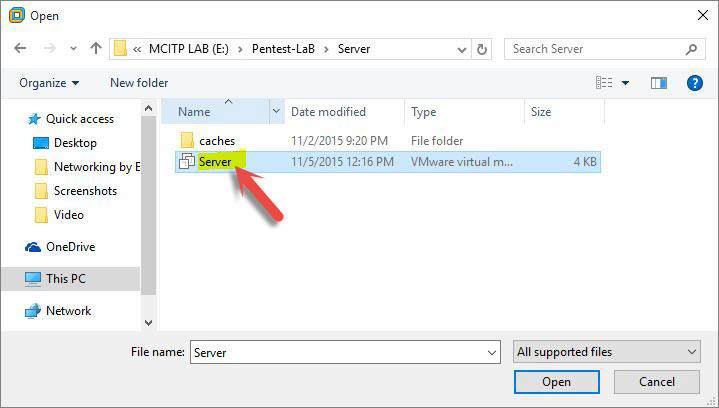
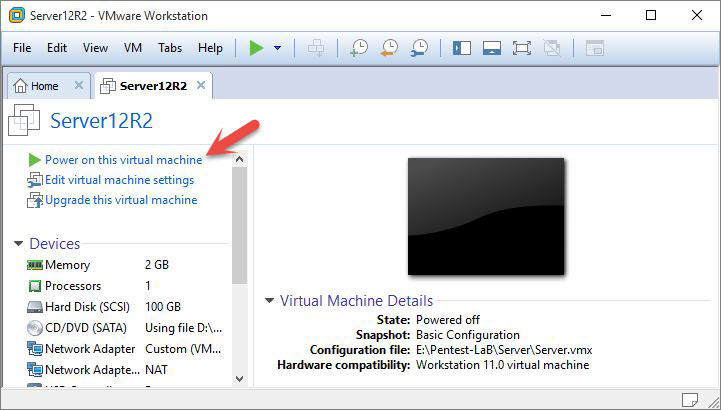
When you install an operating system on VMware Workstation after sometimes you may change your windows, and you have installed all the virtual machine on a separate drive. After changing your windows, you can import all the operating systems which you had installed them before. It has an outstanding advantage because it will serve your time. If you once again install the operating systems, it will take much time to do this. By doing some steps, you can avoid wasting your time. Just follow the below instructions, please. Step #1. Download and Install VMware From its website, then open it. When you opened it click on the Open a Virtual Machine. A new window will pop up for you. Step #2. When you tapped on Open a virtual machine, you have to select one of the installed operating systems from the drive you stored on. Here my operating system is in this path. E: Pentest-LaBServer. Select it then open it. After importing OS, you may select Power on this virtual machine to open up the operating system.
#2. Export Virtual Machine
As you could import a virtual machine now, you can export as well. Exactly wise Versa. As I explained above that when you want to serve your time, to evade wasting time, so it is an excellent way to use it. Just keep reading to get this step as well. Step #1. Open up virtual machine then click on File Tab at up left-hand corner of VMware. Select Export to OVF. Step #2. A new window will pop up you may select a name for your virtual machine and as well as choose a path where it should be saved? Now click save to store in the path you have elected. Finally, it is the end of exporting VM. It was all about importing and exporting Virtual Machine Using VMware Workstation. You can Install any operating system on VMware for more information visit this webpage. If you have any question regarding Virtualization “Hyper-V, VMware” you can hit a comment below. Thanks for being with us.


