OS X El Capitan (version 10.11) is the twelfth major release of OS X, Apple Inc.’s desktop and server operating system for Macintosh computers. It is the successor to OS X Yosemite and focuses mainly on performance, stability and security. So now let’s start a clean installation of Mac OS El Capitan for the first time. In order to do this task, you have to have a bootable USB Flash drive for the Mac operating system. If you Don’t have a bootable USB Flash drive and don’t know how to make bootable the flash for the Mac operating system. We recommend you to follow the under instructions.
How to Create a Bootable USB Flash Drive for the Mac Operating System?
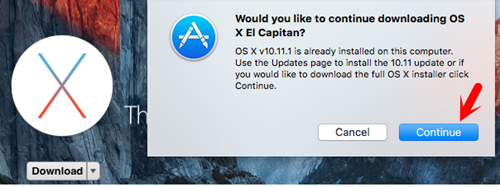
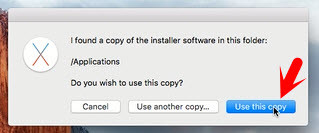
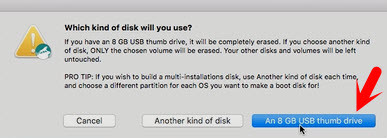
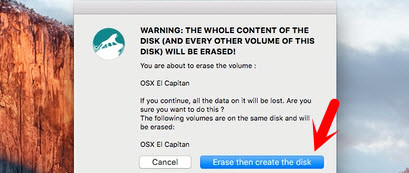
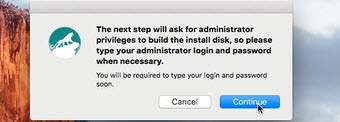
First, you have to download the DiskMaker X 5 from its website then install it on your Mac computer. DiskMaker X (formerly Lion DiskMaker) is an application built with AppleScript that you can use with many versions of OS X to build a bootable drive from OS X installer program (the one you download from the App Store). As soon as you launch the application, it tries to find the OS X Install program with Spotlight. Then, it proposes to build a bootable install disk and make it look as nice as possible. It’s the easiest way to build an OS X Installer in a few clicks! Then you can use the Install drive to fully re-install the OS on a freshly formatted drive, or install it on your many Macs without re-downloading the full installer. Step #1. To create a bootable USB Flash drive for Mac operating system, you have to download the installer file which is around 6 GB. You may download this file from any other places also, but the correct way is this that you have to download it from its store. Step #2. Now click on the DiskMaker X software. Select the Mac OS X version that you have. Here we choose the El Capitan 10.11 version. Next choose Use this Copy. Step #3. In this step, it tells you that which type of disk will you use whether your USB Flash drive or any other disk? So absolutely here, we select the USB Thumb Drive. Now select the OS X El Capitan then click on Choose this disk. Step #4. At this point, if you continue, all the data on this flash will be lost so be careful that you don’t have anything inside flash to loose it. Click Erase to continue the process. When you tapped on Continue button, you will be prompted to enter the username plus password. Just type the username of your computer with password then hit the OK button. The process will automatically start, so be relax & patient. It will take around 30 minutes to complete. At this step, just press on quit button. Next portion of this step by step guide, we will explain how to perform a clean installation of Mac OS El Capitan on Mac Operating System?
Perform a Clean Installation of Mac OSX El Capitan
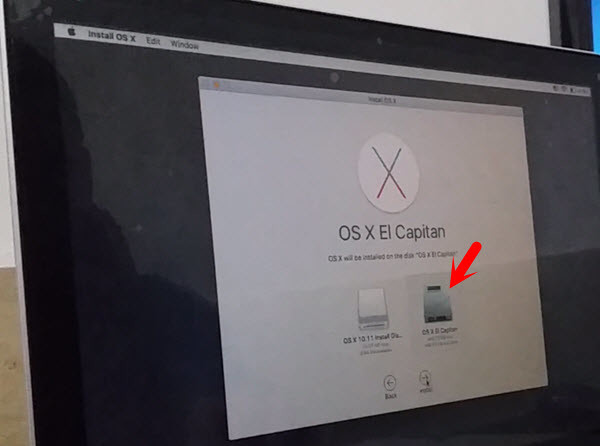
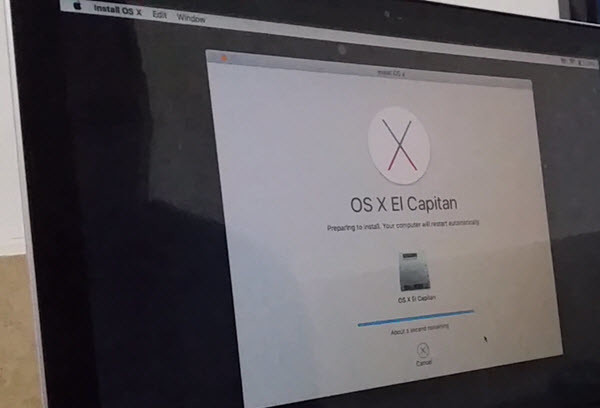
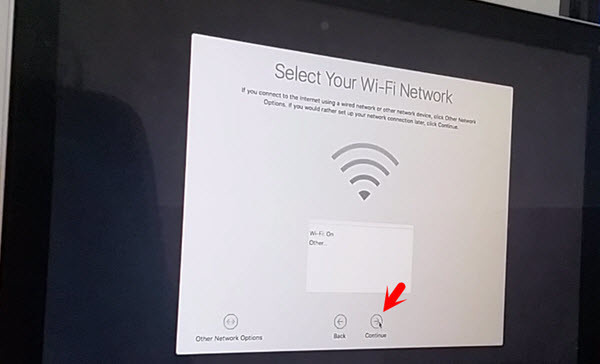
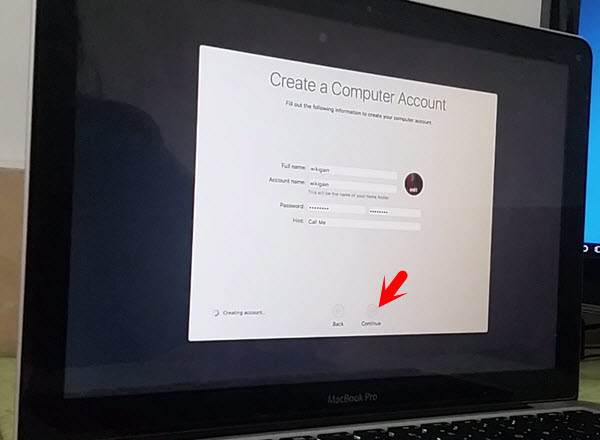
Now that you have learned how to create a bootable USB Flash Drive for Mac Operating System, so let’s start installing the OS X El Capitan. Step #1. When you tapped on Quit button on step 4 of creating a bootable USB Flash Drive for Mac OS X. Now Restart your computer then hold the option key from your keyboard until the USB should appear. Choose the USB Flash Drive. Step #2. Once you have booted the OS X El Capitan, wait for some minutes because it will take the time to complete. During this process, your computer will restart many times so be patient and set relax. After starting, the screenshot below will appear. Choose “Install OS X” then hit the Continue button. Step #3. Click Next the OS X El Capitan terms and conditions. Finally, choose the Hard Disk that you want to install the operating system on it. Step #4. Once you have selected the Hard Disk, wait for 20 or 30 minutes to complete the process. Step #5. Your computer will restart. Right after restarting the computer, select the country, a keyboard language then hit Continue button. Step #6. If you have WAP, type the password and hit the Continue button. If you don’t have any access point, just press on continue. Step #7. In the “Transfer Information to This Mac” window. If you have an Important information on another Mac or PC, you can transfer it to this Mac. You can also transfer data from a time machine backup or another startup disk. Otherwise, click the third option “Don’t transfer any information now “. Tap on Continue button. Step #8. Enable or Disable the Location Services. It depends on you that whether you enable or disable it. Tap on the Continue button then agrees to the terms & conditions. Step #9. Now, you have to create a computer account. Fill the form below like the screenshot. Enter your account name, password, and hint.
What is Hint?
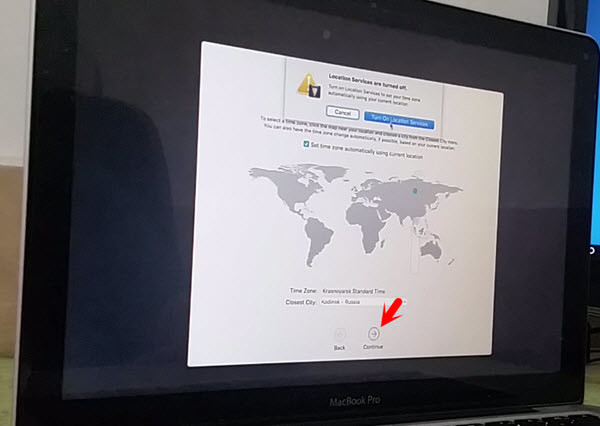
It is functioning as an address when you forget the password. You can recognize from the hint. Even you can type the password on hint area but be careful that everybody will know the password very soon. Step #10. Select your time zone then hit the Continue button. Here, you can enable automatic time zone as well. When you enable automatic time zone, after that your machine will set up the time according to that country or region. It is the last step of a clean installation of Mac OS El Capitan. In the Diagnostics & Usage, tap on the Continue button to end up this process. We recommend you to visit the below articles as well.
What’s New in OS X El Capitan 10.11.2? How to Recover Mac OS X Deleted Files? How to Share Files Between Mac & Windows 10? How to Add Language on All Operating System? Basic Configuration of Mac OS X El Capitan
If you have any question regarding clean installation of Mac OS El Capitan, just share with us.