Do you want to know how I increased organic traffic to one of my posts by 146% in just 30 days? It’s an SEO secret that is overlooked by even the most experienced SEO pros. In this article, I’ll share the exact 5-step process I used to boost search traffic for an old article that was losing traffic. Not just that, this post which was originally published in mid-2017, was ranking at position #5 on Google for my target keywords. Exactly a month later, it ranks at position #1. Since then, I’ve tried this remarkably effective SEO technique with a few of my other posts as well and it’s worked like magic. And in this post, I’ll show you exactly how you can try this technique and witness phenomenal results. Let’s get started.
Getting Inspiration: Historical Optimization and Content Relaunch
I would be doing an injustice if I didn’t credit the posts that inspired me to try this technique out. There were two posts that paved the way for my SEO experiment.
Getting Inspiration: Historical Optimization and Content RelaunchThe SEO Experiment that Resulted in Increased Search TrafficThe 5-Step Process to Higher RankingsStep 1: Identify the post that needs an updateStep 2: Upgrade your content with new informationStep 3: Optimize your target keywordsStep 4: Add new visualsStep 5: Relaunch the postBonus Step: Steal Your Competitors’ BacklinksFinal Thoughts
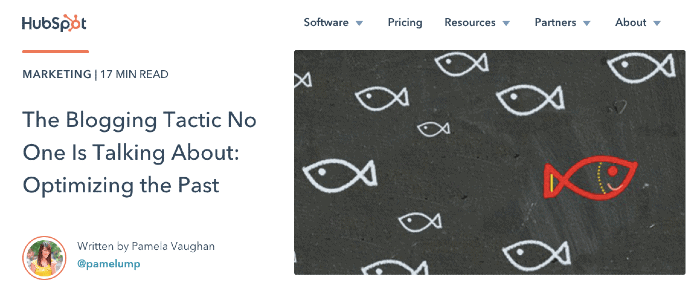
The first one was a post by HubSpot titled, “The Blogging Tactic No One Is Talking About: Optimizing the Past.”
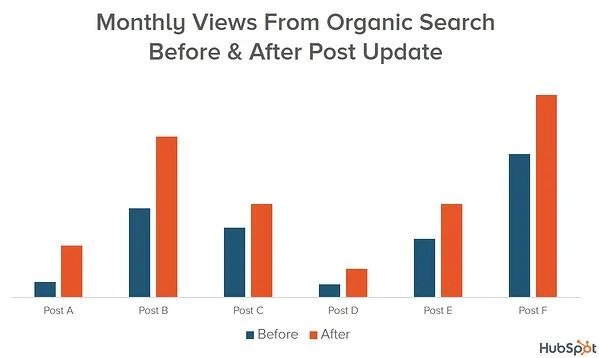
In the post, Pamela Vaughan from HubSpot reveals a blogging strategy called “historical optimization.” Here’s how she defines it: Historical optimization means updating and optimizing your “old” blog content so it’s fresh, up-to-date, and has the ability to generate even more conversions and organic search traffic than it already does. Put differently, historical optimization is the process of relaunching an old article with new and updated information in an effort to boost its search traffic and conversions. Using historical optimization, HubSpot was able to increase the number of monthly organic search views of old posts by an average of 106%.
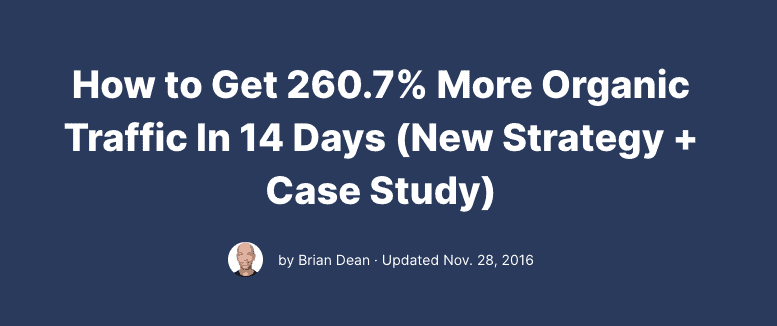
Since then, historical optimization has become an integral part of HubSpot’s blogging strategy, and they have numerous blog posts, case studies, and even an eBook dedicated to the process. The second post that encouraged me to try this technique was Brian Dean’s content relaunch post called, “How to Get 260.7% More Organic Traffic In 14 Days.”
Incidentally, HubSpot’s historical optimization article inspired Brian Dean to try this SEO technique at Backlinko. Within 2 weeks of updating and relaunching an old post, the organic search engine traffic for that post was up by 260.7%. After learning about the exponential growth in traffic that both HubSpot and Backlinko achieved, I knew I had to try this technique to see if it worked. So began my SEO experiment…
The SEO Experiment that Resulted in Increased Search Traffic
I first tried this SEO technique with this article:
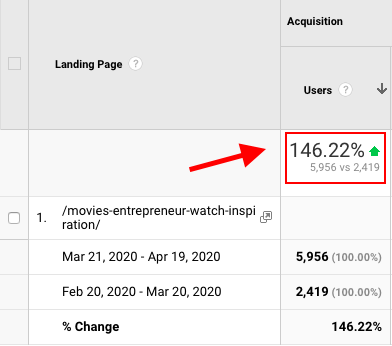
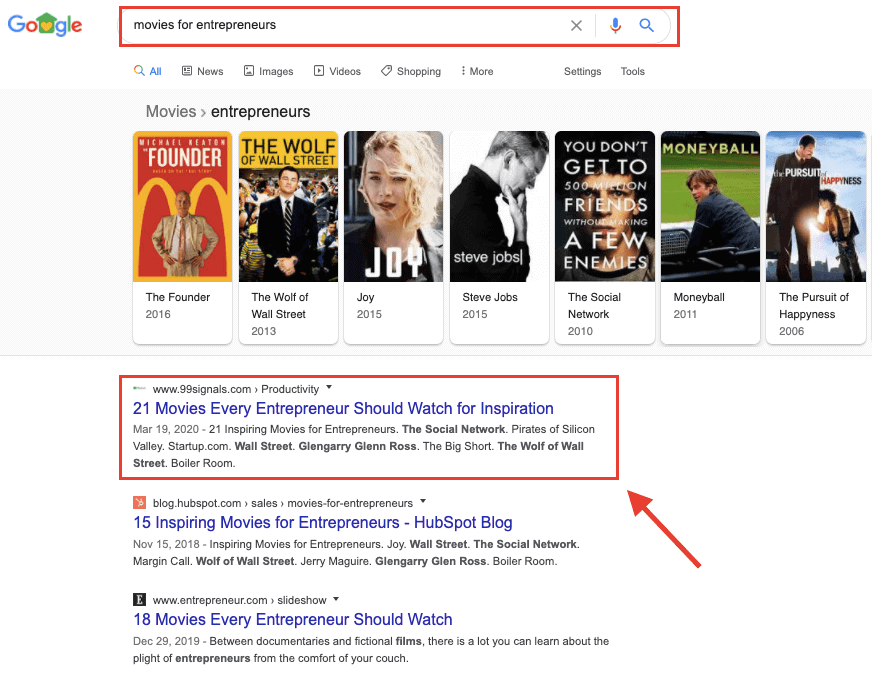
At the time of optimizing the post, it was ranking at position #5 for the target keyword terms, “movies for entrepreneurs.” It was fetching close to 2,500 monthly organic visitors, but I had noticed a downtrend in its search traffic in the last 3 months. I knew it could drive more organic traffic and had the potential to rank at #1 with a few tweaks. So I decided to update and relaunch the article. Exactly one month later, the blog post was getting 146% more organic traffic (i.e., 5,956 visits vs. 2,419 visits.)
Furthermore, the article had climbed up the search rankings. It was now ranking at position #1 for high-volume keywords such as “movies for entrepreneurs” and “entrepreneur movies,” outranking authoritative competitors such as HubSpot, Entrepreneur, and Lifehack.
Once I saw the traffic and rankings boost this post received, I was convinced this technique really worked. So I decided to update and relaunch 5 other articles on my blog. Here are the results:
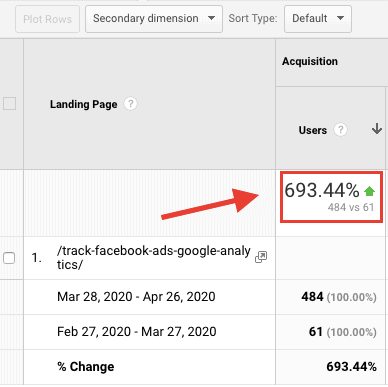
How to Get High-Quality Backlinks with Infographics witnessed an increase in search traffic by 16.91% 10 Best TV Shows for Entrepreneurs saw an increase of 94.43% in organic traffic 27 Best Marketing Podcasts received a search traffic boost of 15.96% 10 Best YouTube Channels for Entrepreneurs saw an increase of 59.21% in search traffic How to Track Facebook Ads in Google Analytics received an organic traffic boost of 693.44%.
That’s right. The last post featured here witnessed a 693.44% increase in search traffic. But more on that later. Let’s first explore the 5-step process that enabled me to boost my organic traffic.
The 5-Step Process to Higher Rankings
Step 1: Identify the post that needs an update
The first, and perhaps the most important, step is to identify the post on your blog that needs an update. You’ve got to pick a post that already gets a decent amount of organic traffic and that’s already ranking on page 1 for your target keywords. This is not to say posts that are ranking outside page 1 don’t deserve an update. They certainly do. My guide to tracking Facebook ads in Google Analytics, which I updated and relaunched, was floundering on page 2 of Google. Once it was relaunched, the organic traffic to the post simply skyrocketed.
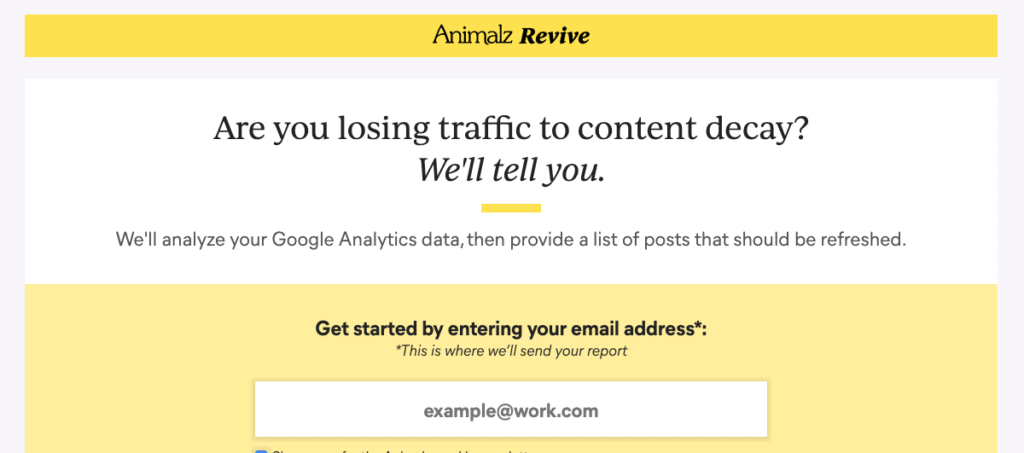
Having said that, you’ve got to prioritize. Once you’re done optimizing your top organic posts that are losing traffic, you can move on to the other posts. So how do you identify posts that are losing organic traffic? You can do this the manual way by digging into your Google Analytics data to see which pages are underperforming. Or you could use Animalz Revive Tool, a free tool that syncs with your Google Analytics traffic data to show you which of your posts are underperforming.
You just need to enter your email address and within a few hours, Animalz will share a detailed report showing all the pages on your site with the biggest traffic drop. To get started, you can pick any of these posts and move on to step #2.
Step 2: Upgrade your content with new information
Once you’ve identified the post that needs an update, the next step is to upgrade your article with new information. The “Best Movies for Entrepreneurs” article was originally published on July 26, 2017. Back then, the list comprised of just 14 movies. Being the movie buff that I am, I knew I could add more. Plus, there were releases from 2018 and 2019 which could make the cut. I also noticed that the other articles which were ranking in search engine result pages (SERPs) for my target keyword terms had just 10-15 movies featured on their lists. So I knew I could make my article stand out by including more movie recommendations for entrepreneurs, and possibly, outrank my competition in search results. So I added 7 more movies to the list, rounding off the list to 21 movies. I also improved the internal link structure by adding links to other relevant resources for entrepreneurs on my blog at strategic places within the article.
I also made sure that the article was keyword-optimized, which brings me to my next step.
Step 3: Optimize your target keywords
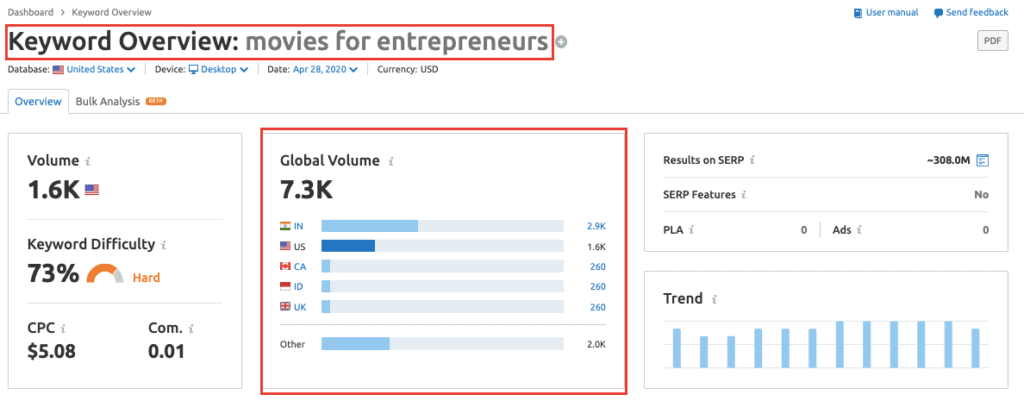
The next step is to optimize your target keywords. I was mainly targeting the keywords “movies for entrepreneurs” and “entrepreneur movies” — both of which had a monthly global search volume of 7,300.
As mentioned earlier, I was ranking at position #5 for these keywords, so I knew there was scope for improvement. There are two crucial elements to keep in mind while optimizing keywords on your site:
Keyword Frequency
Keyword frequency is the number of times your target keywords appear in your post. I’d suggest you use your target keywords sparingly in your content. There was a time when it was common practice in SEO to stuff keywords everywhere in your content. Google put an end to this black hat practice when it rolled out the Panda algorithm update in 2011. If you indulge in keyword stuffing these days, your site will be penalized by Google and your search rankings will be deeply affected. So don’t go overboard with your target keywords. Repeat them not more than 2-3 times in your content. Instead, use different keyword variations of your seed keywords in strategic places. And use them only when you’re sure they’ll add more depth and nuance to your content. Which brings me to my next point…
LSI Keywords
Latent Semantic Indexing (LSI) keywords are “synonyms and closely-related terms” that Google uses to determine the relevance and quality of your content. In other words, LSI keywords are phrases that are closely related to your seed keyword.
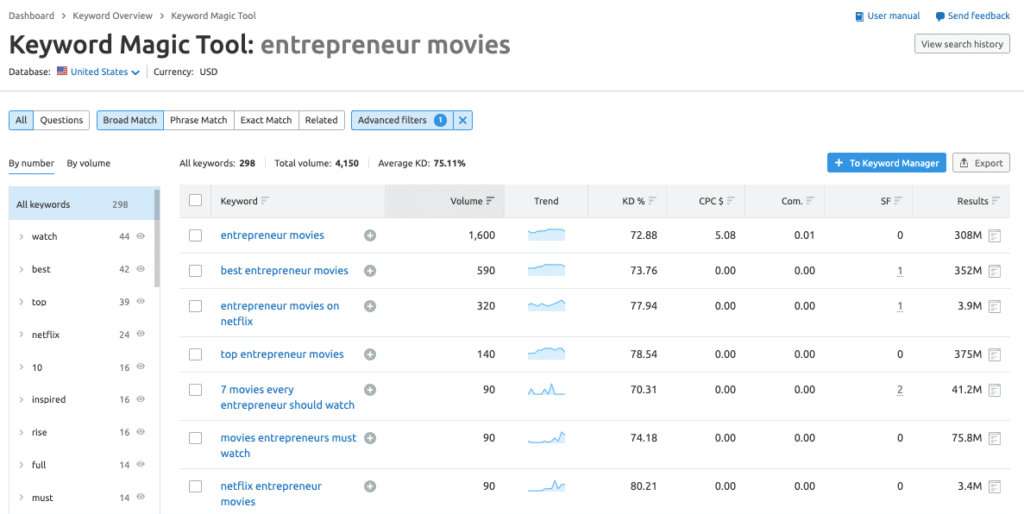
When it comes to LSI keywords, the SEO community is split. Some believe adding LSI keywords helps Google understand your content better while others believe it’s a waste of time. In my experience, I’ve seen that adding LSI keywords helps boost rankings. And it certainly helped in this case. When you’re publishing long-form articles, chances are that you’ll naturally use LSI keywords in your content. That said, it doesn’t hurt to research your LSI keywords beforehand and examine different keyword metrics for all the keyword variations you’ll be eventually using in your content. I used SEMrush’s Keyword Magic Tool and Google’s related searches for this task, but you can find LSI keywords with any keyword research tool you’re currently using. The first iteration of my post was short on LSI keywords. So I decided to sprinkle a few related phrases here and there. First, I plugged my target keywords into SEMrush’s Keyword Magic tool:
I found close to 300 variations for my target keywords, but based on the context of my post, these were the keywords I ended up using:
“movies every entrepreneur should watch” “best biography movies” “best entrepreneur movies” “inspiring movies for entrepreneurs” “best startup movies”
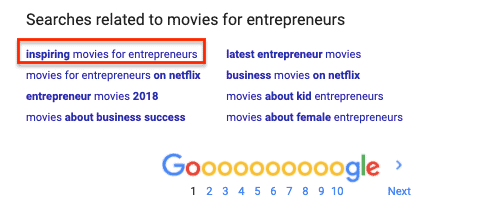
Next, I gave a Google search and found these related searches right at the bottom of page 1:
Since I had already received some validation from SEMrush earlier, I ended up using the keyword terms “inspiring movies for entrepreneurs” a couple of times in my content. Site note: If you’d like to explore SEMrush’s key features, get free access to SEMrush’s GURU plan for 30 days by clicking here (worth $199.95)
Step 4: Add new visuals
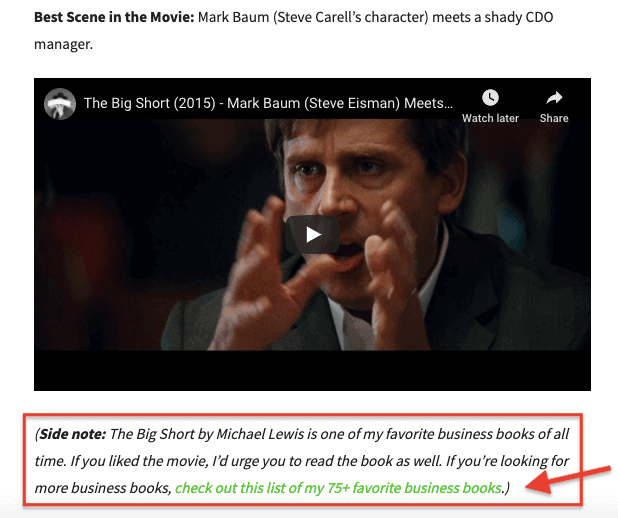
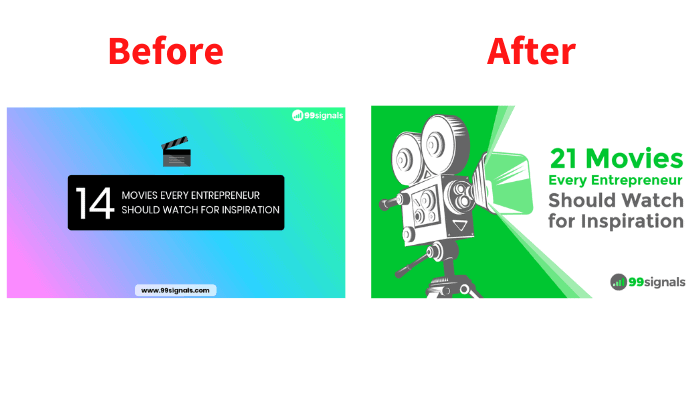
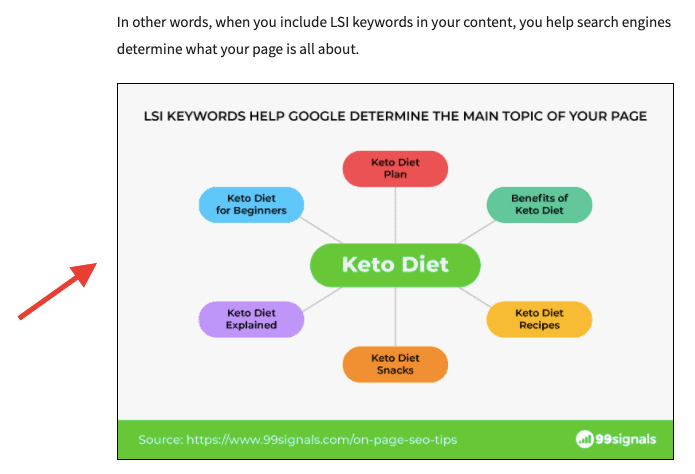
Adding visuals to your content is key in increasing engagement and enhancing the user experience on your site. When used strategically, images and videos can supplement your content and provide a visual break from the text. The engagement metrics for the article I was updating were already quite good, but I knew there was one major change I could make i.e., to change the main blog graphic or featured image for the post. When I first published this article in 2017, I was designing the blog graphics myself using online design tools like Canva and Venngage. Since then, my blog has gone through a major design overhaul and I outsource most of my design work to Design Pickle. As is the case with most other featured images on my blog, I entrusted my dedicated designer at Design Pickle to reimagine the featured image for this article. As you can see, there is a remarkable difference in terms of the quality of these designs. Clearly, the latter was designed by a professional designer with years of experience. Now I’m not suggesting that you hire a dedicated designer for your blog (though that may help). What I’m suggesting is that you add unique images, screenshots, and even videos to elaborate on some of your points. With some of my other posts where the topic is a little more complex, I have used explainer graphics and screenshots wherever relevant, like in this post here:
So make sure your updated article has new and improved visuals to increase user engagement and dwell time on your site.
Step 5: Relaunch the post
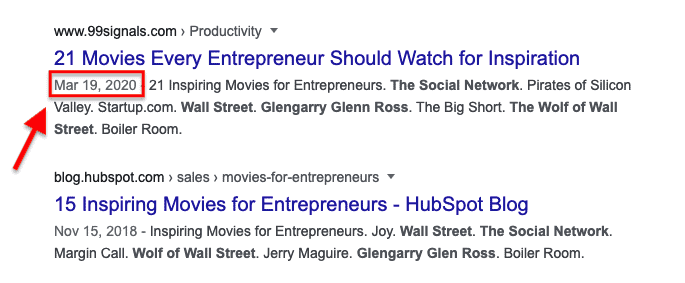
Once your updated post is ready, it’s time to relaunch it. Here’s an important step: You need to change the “published” date of your article. This small change will not just ensure that your updated post is at the top of your blog feed, but the “published” date will also be highlighted in search result pages.
No one wants to land on an outdated article. Since you have updated your article with new and fresh information, it’s only logical that you’re changing the “published” date. Almost all major blogs and publications follow this practice. In fact, it’s a part of Ahrefs’ core strategy.
Do you know any other blogs that are so committed to keeping their content fresh & awesome? 🙂 pic.twitter.com/SIGbEQpWW9 — Tim Soulo (@timsoulo) March 27, 2019 Just make sure you add a note at the end of the article so your readers know it’s an updated post.
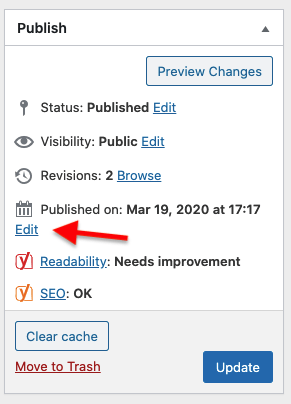
To change your “published” date on WordPress, navigate to the “Publish” section of your post, click on edit, change the date to today, and click “Update.”
That’s it. You’re all set. Once you’re done updating and relaunching the article, you can move back to step #1 and repeat the whole process again for other blog posts that are underperforming in SERPs.
Bonus Step: Steal Your Competitors’ Backlinks
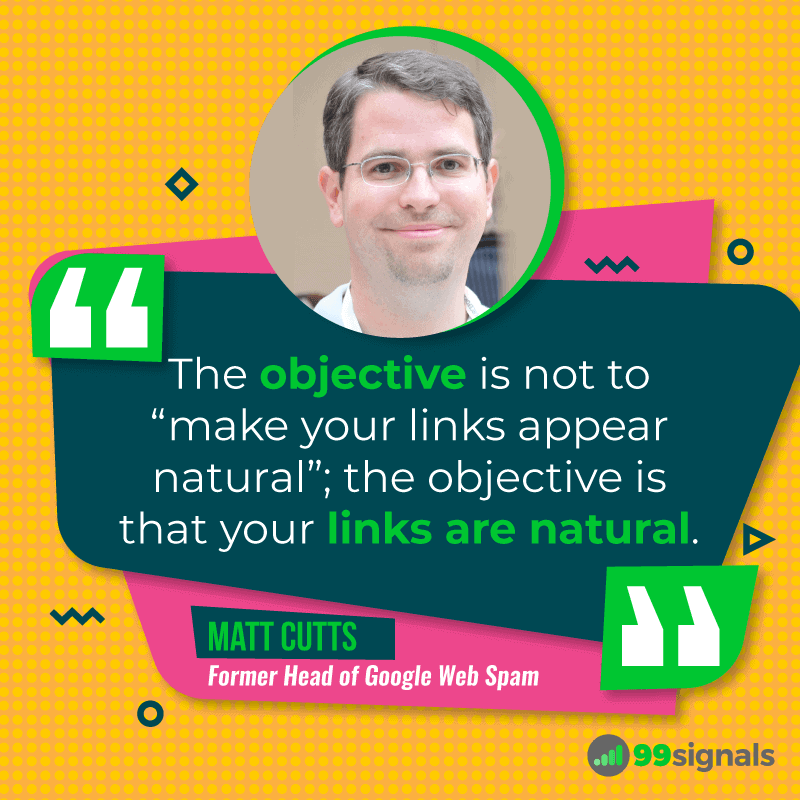
Sometimes good content doesn’t need authoritative backlinks to rank. With this specific article, that was certainly the case as I was able to rank on page 1 of Google without actively trying to build backlinks. All the links that currently point to this article were generated naturally. Perhaps Matt Cutts was right all along…
But I haven’t always been this lucky. In most of the cases, I’ve had to build authoritative backlinks in order to start ranking on page 1 for my target keywords. In such instances, I almost always rely on a combination of competitor research and blogger outreach. Here’s how you should proceed:
Check out all the top-ranking pages for your target keywords. You can get this data by using SEMrush or Ahrefs Publish content that’s better than your competition as explained in step #2. Add something unique as highlighted in step #4. Perform a link building outreach campaign by sending personalized emails to each publication/blogger who has linked to any of your competitors. Highlight a few things that are unique in your content and provide reasons as to why your post is more in-depth than that of your competition. You can use any of these outreach tools for this specific task.
Not all bloggers and publications will respond to your email. That’s ok. If your content is informative and in-depth, and you’ve provided compelling reasons in your email as to why they should link to your content, you’ll soon achieve success in your link building efforts. Link building is arguably one of the most challenging aspects of SEO. But it’s not impossible. It takes time, skill, and effort to master this technique, but once you’ve seen the results, you’ll understand why it’s one of the most sought-after SEO skills. Here are some resources on my blog that can help you with competitor analysis and link building:
How to Get High-Quality Backlinks (25 Proven Techniques) How to Do Competitor Analysis with SEMrush [A Detailed Guide] How to Get High-Quality Backlinks with Infographics
Final Thoughts
Now that you know the 5-step process to increased organic traffic, it’s time you gave this SEO technique a shot. But remember: Content update should never be a substitute for publishing new content. Make sure you adhere to a content calendar and publish new articles on a timely basis to keep your readers engaged. If you have any questions about this technique or any of the steps outlined above, leave a comment below and I’ll be glad to answer all your questions. If you found this article useful, please share it on Twitter using the link below:
Image SEO: 7 Actionable Tips to Supercharge Your Organic Traffic SEMrush vs Moz: Which is the Best SEO Tool? 10 Best SEO Podcasts to Master the Art of SEO 20 Questions to Ask Potential SEO Clients 19 Best SEO Plugins for WordPress
